
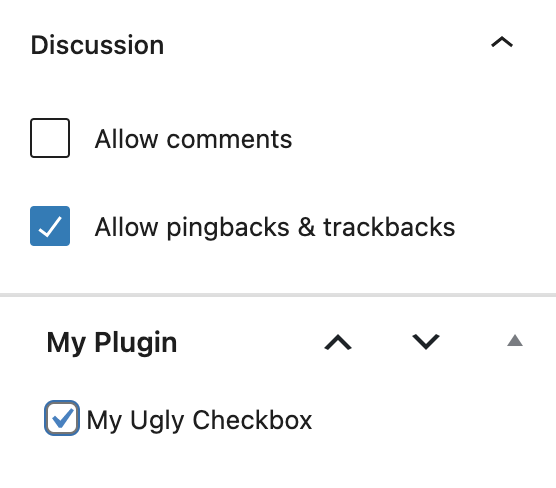
Have you ever used the WordPress Meta Box API and had the controls look entirely different from the core WordPress controls?
Regular HTML controls don’t have the styling that WordPress core controls do.
React components solve this problem. This article will show you how to use React components in a custom WordPress meta box so that your plugin control looks and feels like the controls added by WordPress core.
What is the WordPress Meta Box API?
The WordPress Meta Box API is a programming interface that allows developers to create custom meta boxes in the WordPress dashboard. Meta boxes are user interface elements that will enable you to add and edit additional information about a post or page.
The Meta Box API provides developers with functions and classes to create and manage custom meta boxes. These meta boxes can contain various fields, such as text inputs, dropdowns, checkboxes, radio buttons, and more. You can also define validation rules and provide custom input sanitization to ensure data consistency and security.
The WordPress Meta Box API is a powerful tool for developers looking to extend the functionality of WordPress and provide users with an intuitive way to manage additional information for their posts and pages.
Creating the base WordPress Meta Box in PHP
First, you create a meta box in WordPress to hold your components. In your theme or plugin, use the add_meta_boxes action to create a div that will hold the React components:
function better_meta_box_callback() {
	?>
	<div id="better-meta-box-element">
		Requires Javascript ?!
	</div>
	<?php
}

add_action( 'add_meta_boxes', function() {
	add_meta_box(
		'better-meta-boxes',
		'BMB',
		'better_meta_box_callback',
		null,
		'side'
	);
} );
The callback function for add_meta_box creates an element with the better-meta-box-element ID that we’ll render our React components to.
Create a React Component
Replace the element we defined above with our desired components.
import { render } from '@wordpress/element';
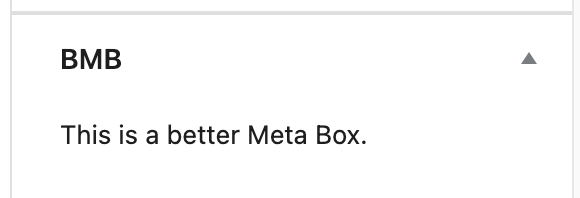
const MyMetaBox = () => (
<div>
<p>This is a better Meta Box.</p>
</div>
);
render(
<MyMetaBox />,
document.getElementById( 'better-meta-box-element' )
);MyMetaBox is a parent component that will hold any component you choose from the WordPress core. See the WordPress component reference for the complete list. You can include any control you’ve seen in base WordPress in your meta box.
Register the Javascript file in your plugin or theme, so WordPress loads the component you defined.
Update a Post Meta value
Now we’ll add a component to the skeleton meta box that updates a post meta field. Most examples use a text input to update a string, so instead, we’ll use a toggle control to update a boolean.
Register the Post Meta in PHP
add_action(
    'init',
    function () {
        register_post_meta(
	    '',
	    '_better_meta_box_value',
	    array(
	        'show_in_rest' => true,
                'type' => 'boolean',
                'single' => true,
                'default' => false
            )
        );
     }
);
We’re adding a post meta value named _better_meta_box_value that is initially false and is available to all post types. The argument show_in_rest must be true since the post editor sends the update via the REST API.
The meta value name begins with an underscore (_) to make it private, ensuring it won’t show up in the custom fields panel – if enabled. If the custom fields panel is enabled and the post attribute is not private, then there can be a collision between the two when the post is saved.
Note that if you have custom post types, they must support custom-fields or be excluded.
Add a React Component to our Meta Box
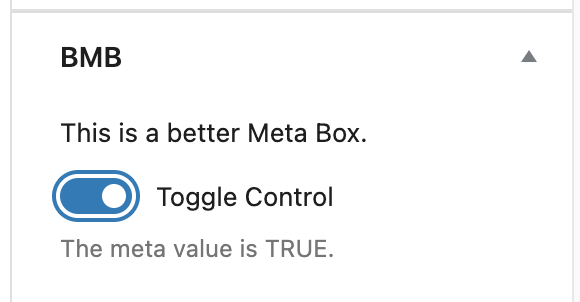
Finally, we’re ready to add a ToggleControl that toggles the boolean value.
First, we create a custom component that reads the initial value from the post and then sets it when toggled.
import {ToggleControl} from '@wordpress/components';
import {useSelect, useDispatch} from '@wordpress/data';

const MyToggle = () => {
    const meta = useSelect(function (select) {
        const data = select('core/editor').getEditedPostAttribute('meta');
        return data ? data['_better_meta_box_value'] : false;
    }, []);

    const {editPost} = useDispatch('core/editor');

    return (
        <ToggleControl
            label="Toggle Control"
            help={
                meta
                    ? 'The meta value is TRUE.'
                    : 'The meta value is FALSE.'
            }
            checked={ meta }
            onChange={(e) => {
                editPost({
                    meta: {_better_meta_box_value: e},
                });
            }}
        />
    );
};
Then add this component to MyMetaBox:
const MyMetaBox = () => {
    return (
        <div>
            <p>This is a better Meta Box.</p>
            <MyToggle/>,
        </div>
    );
}
The meta value is updated when the value is toggled and the post saved.
Make your WordPress Meta Box default closed.
Numerous Stack Overflow questions ask how to make a custom WordPress meta box render initially closed. Most answers suggest custom PHP code that updates the post meta, which WordPress uses to store the initial state.
This PHP approach is unnecessarily complicated, and instead, you should just set the closed class on the initial meta box element when you render a component.
if (window.location.search) {
    const params = new URLSearchParams(window.location.search);
    if (params.get('post')) {
        document.getElementById('better-meta-boxes').classList.add('closed');
    }
}
We check the URL to see if the post query string parameter is present. When post is in the query string and the post has been saved, then WordPress remembers the previous state. If post is missing in the query string, then you are creating a new post, so we add the closed class to the parent element, and WordPress shows the meta box as initially closed.
The above code works with any WordPress meta box, not just ones that utilize React components.
Conclusion
This article shows you how to add better meta boxes to the post editor that have a consistent look and feel with the rest of WordPress.
The main advantage of this approach is that the panel is located at the bottom of the post-edit sidebar.
See our GitHub repository containing all code from this article, plus the associated build setup.